Appearance
Deploying with HaaS
This guide walks you through the step-by-step process of deploying your daemon (and optionally your AI service) using HaaS through the Publisher Portal.
Before You Begin
- Complete the Prerequisites
- Full-Stack mode: prepare your repository per the Preparing Your AI Service Repository guide
Step 1: Activate HaaS
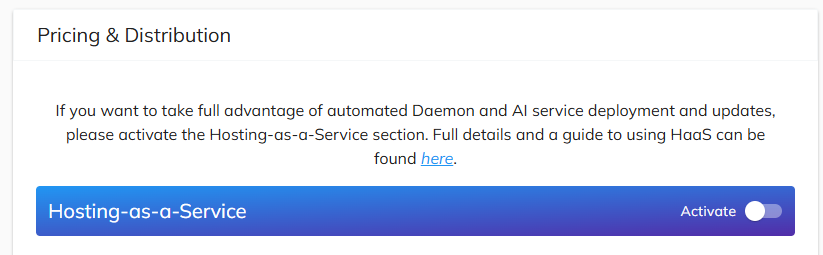
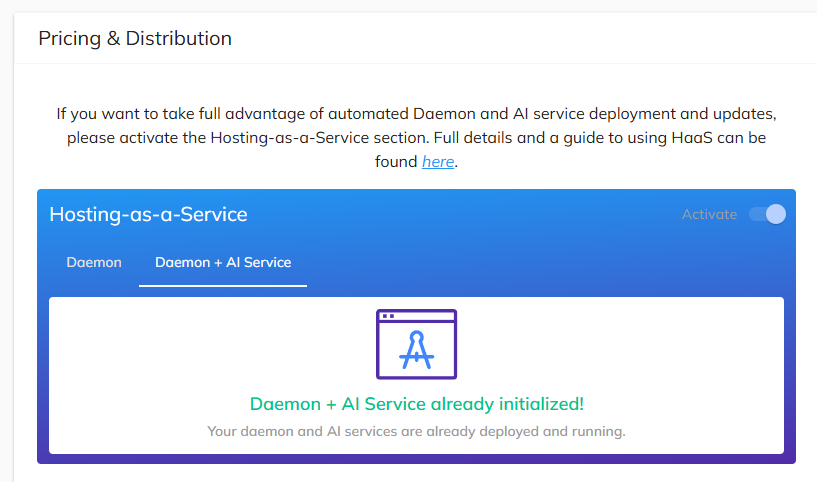
After completing the first two steps of service creation in the Publisher Portal (service profile and metadata), you will reach the Pricing & Distribution step.
You will see a description of the Hosting-as-a-Service section with a link to the documentation and an Activate toggle. Click the toggle to enable HaaS for your service.
Step 2: Choose Deployment Mode
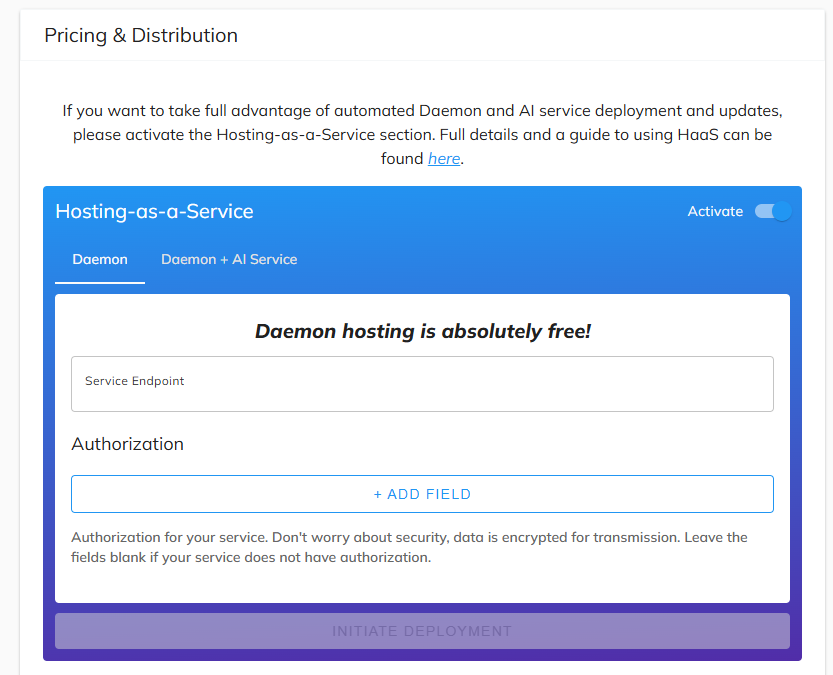
Once activated, you will see two tabs:
| Tab | Description |
|---|---|
| Daemon | Hosts only the daemon — you provide your own AI service endpoint |
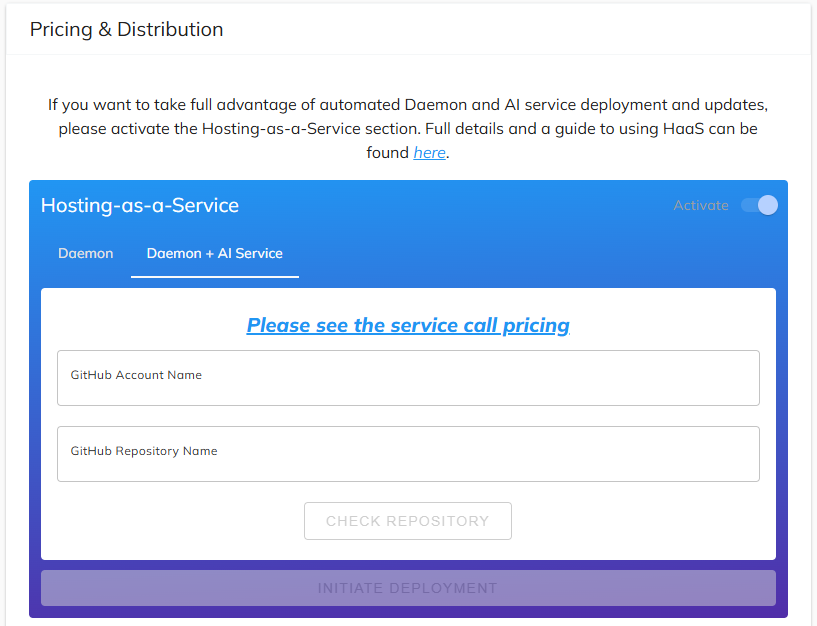
| Daemon + AI Service | Hosts both the daemon and your AI service from a GitHub repository |
Select the tab that matches your deployment mode.
Step 3: Configure Deployment
Daemon Only Mode
On the Daemon tab, provide the endpoint of your externally hosted AI service:
| Field | Required | Description | Example |
|---|---|---|---|
| Service Endpoint | Yes | Public URL where your AI service is running | https://api.yourservice.com |
| Authorization | No | Key, value, and location for each auth parameter | Key: Authorization, Value: Bearer token123, Location: Header |
WARNING
Ensure your service endpoint is publicly accessible and properly configured to handle requests from the HaaS daemon.
Full-Stack Mode (Daemon + AI Service)
On the Daemon + AI Service tab, provide your GitHub repository details:
| Field | Required | Description | Example |
|---|---|---|---|
| GitHub Account Name | Yes | GitHub account or organization that owns the repository | your-github-username |
| GitHub Repository Name | Yes | Name of the repository with your AI service code | my-ai-service |
| Service Type | Yes | Type of compute resource for your AI service | CPU / GPU |
Click Check Repository to verify the SingularityNET HaaS GitHub App is installed on the repository.
WARNING
You must install the SingularityNET HaaS GitHub App on your repository before checking. Without it, the platform cannot access your repository or trigger automatic redeployments.
Step 4: Initiate Deployment
Click Initiate Deployment after filling in the required fields. If applicable, MetaMask will prompt you to confirm the transaction.
The platform then automatically:
- Provisions dedicated infrastructure
- Deploys and configures the daemon
- Generates and applies SSL certificates
- Sets up payment channel storage (ETCD)
- Populates daemon configuration in your service settings
- Full-Stack mode: Builds and deploys your AI service from the GitHub repository
Step 5: Review Auto-Configuration
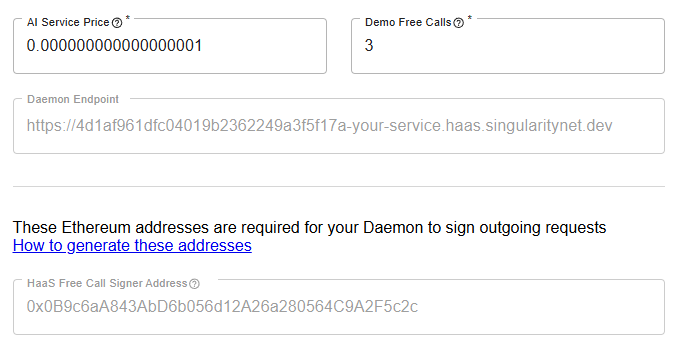
The following fields are automatically filled in your service configuration:
| Field | Description |
|---|---|
| Daemon Endpoint | Public HTTPS endpoint for your hosted daemon (e.g., https://<hash>.haas.singularitynet.dev) |
| HaaS Free Call Signer Address | Ethereum address used for free call authentication |
TIP
No ETCD configuration is required — HaaS uses a managed ETCD cluster automatically.
Full-Stack Deployment Progress
In Full-Stack mode, the AI service deployment progresses through the stages described in the Deployment Lifecycle. Monitor progress in the HaaS Dashboard.
Step 6: Verify Deployment
After deployment completes, you can verify the status on the Pricing & Distribution page. For Full-Stack deployments, a successful setup will show:
Step 7: Complete Service Publication
After HaaS successfully deploys your daemon (and AI service in Full-Stack mode), complete the remaining service publication steps in the Publisher Portal. Once published, your service is live on the AI Marketplace with fully managed infrastructure.
Next Steps
TIP
Head to Managing Deployments & Billing to learn how to monitor your deployments, view logs, and manage your subscription.