Appearance
Guide to Publishing an Organization and Service via TUI
Platform URLs
| Environment | Publisher Portal | Marketplace |
|---|---|---|
| Mainnet | publisher.singularitynet.io | marketplace.singularitynet.io |
| Testnet | testnet.publisher.singularitynet.io | testnet.marketplace.singularitynet.io |
Why Choose TUI?
The Text User Interface (TUI) provides a terminal-based menu system that guides you through the publishing process step by step. This method strikes a balance between the simplicity of a GUI and the power of command-line tools.
Method Comparison
| Aspect | TUI | Publisher Portal | CLI |
|---|---|---|---|
| Interface | Terminal menus | Web browser GUI | Command line |
| Marketplace UI Demo | ❌ No | ✅ Yes (optional) | ❌ No |
| Learning Curve | Moderate | Easy | Steep |
| Remote Access | ✅ SSH-friendly | ❌ Requires browser | ✅ SSH-friendly |
| Navigation | ✅ Menu-driven | ✅ Point-and-click | ⚠️ Command memory |
When to Use TUI
Choose this method if:
- You prefer terminal environments but want guided assistance
- You're working on remote servers without GUI access
- You need to manage services over SSH connections
- You don't want to memorize CLI commands
- You like the efficiency of keyboard navigation
- You want a middle ground between GUI and CLI
Limitations to Consider
- No marketplace UI demo - Services are only accessible via CLI/SDK
- Terminal dependency - Requires terminal emulator
- Less flexible than CLI - Cannot be easily scripted
- No automation support - Manual interaction required
Service Accessibility After Publishing
Services published via TUI are accessible through:
- CLI - Developers can call via snet-cli
- SDK - Integration into applications (Python, JavaScript, Java)
- Marketplace Web UI - No demo interface available
Important: Like CLI, services published via TUI cannot have marketplace UI demos. Users must use programmatic methods to interact with your service.
Perfect Use Cases
TUI excels in these scenarios:
- Server administration - Managing services on headless servers
- Remote deployment - Publishing services over SSH
- Terminal preference - When you prefer keyboard over mouse
- Learning phase - Transitioning from GUI to CLI
- Cross-platform - Works consistently across Windows, Linux, macOS
Interactive Experience
TUI offers unique advantages:
- No command memorization - Navigate with arrow keys
- Visual feedback - See options and current selections
- Error prevention - Invalid options are not selectable
- Consistent workflow - Same menu structure every time
Alternative Methods
Not sure if TUI is right for you? Check the Full Onboarding Guide for a detailed comparison of all three methods:
- Publisher Portal - Web GUI with marketplace demo capability
- CLI - Direct commands for automation and scripting
Step 1: Install
Start by cloning the Github repo with the following command :::code_group
sh
cd <FolderPath>
git clone https://github.com/singnet/TUI.git
Step 2: Execute script
After cloning the repo, all you have to do is call the "run" script designed for your operating system.
powershell
cd <TUI Repo Path>
# Call the run script
.\windows_run.bat
sh
cd <TUI Repo Path>
# make the script executable
chmod +x linux_run.sh
# Call the run script
./linux_run.sh
sh
cd <TUI Repo Path>
# make the script executable
chmod +x macos_run.sh
# Call the run script
./macos_run.sh
Step 3: Create Identity

- Enter Identity name
- Select Type of ................ (We will use Key in our Onboarding)
- Select Network (We will use Sepolia in our Onboarding)
- Enter your private key from Metamask
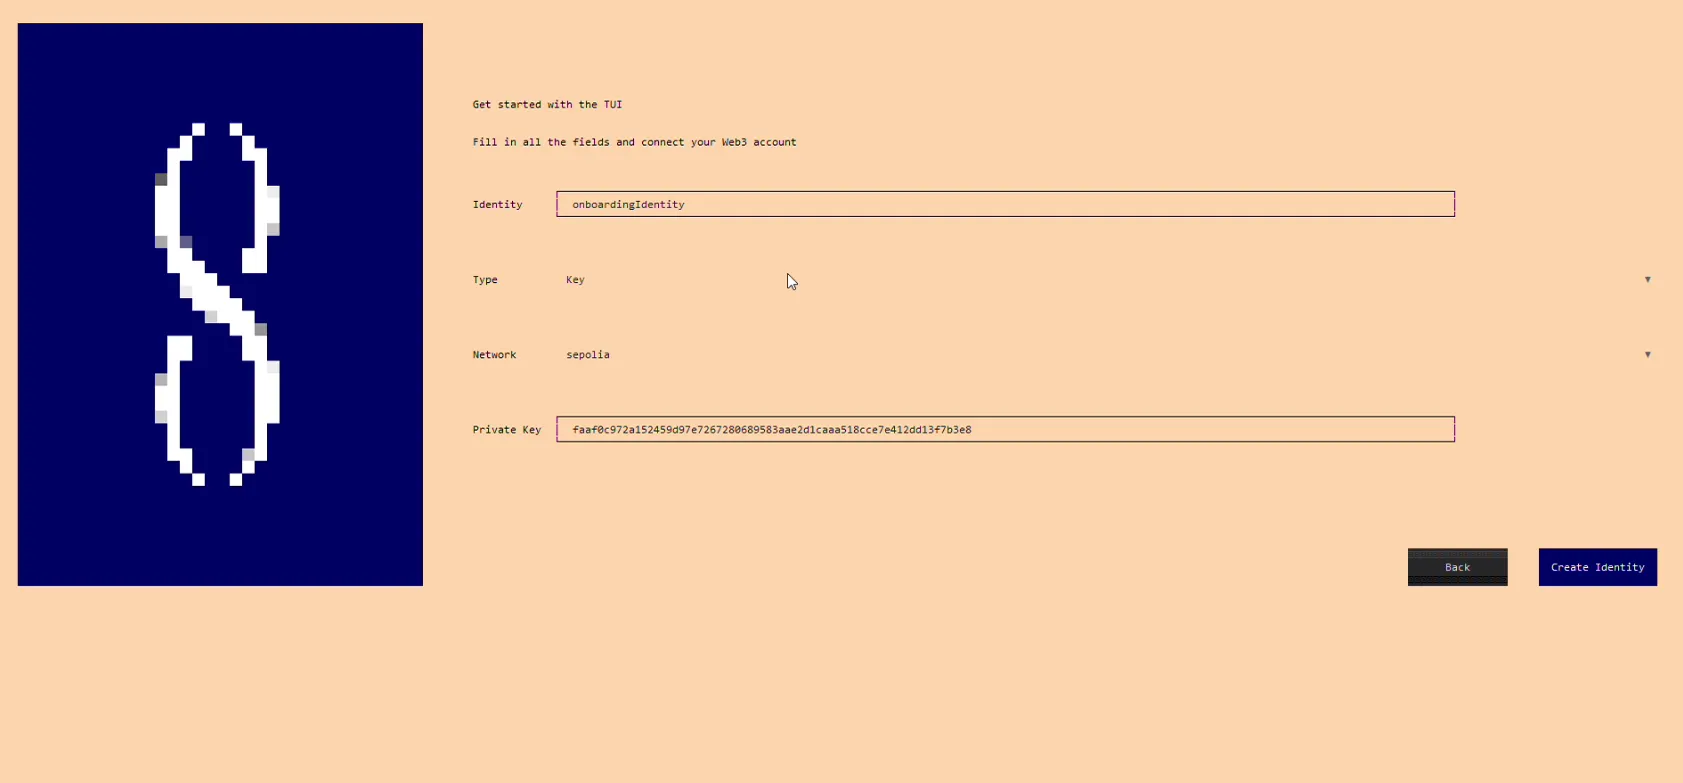
- Press "Create Identity". Identity was successfully created!
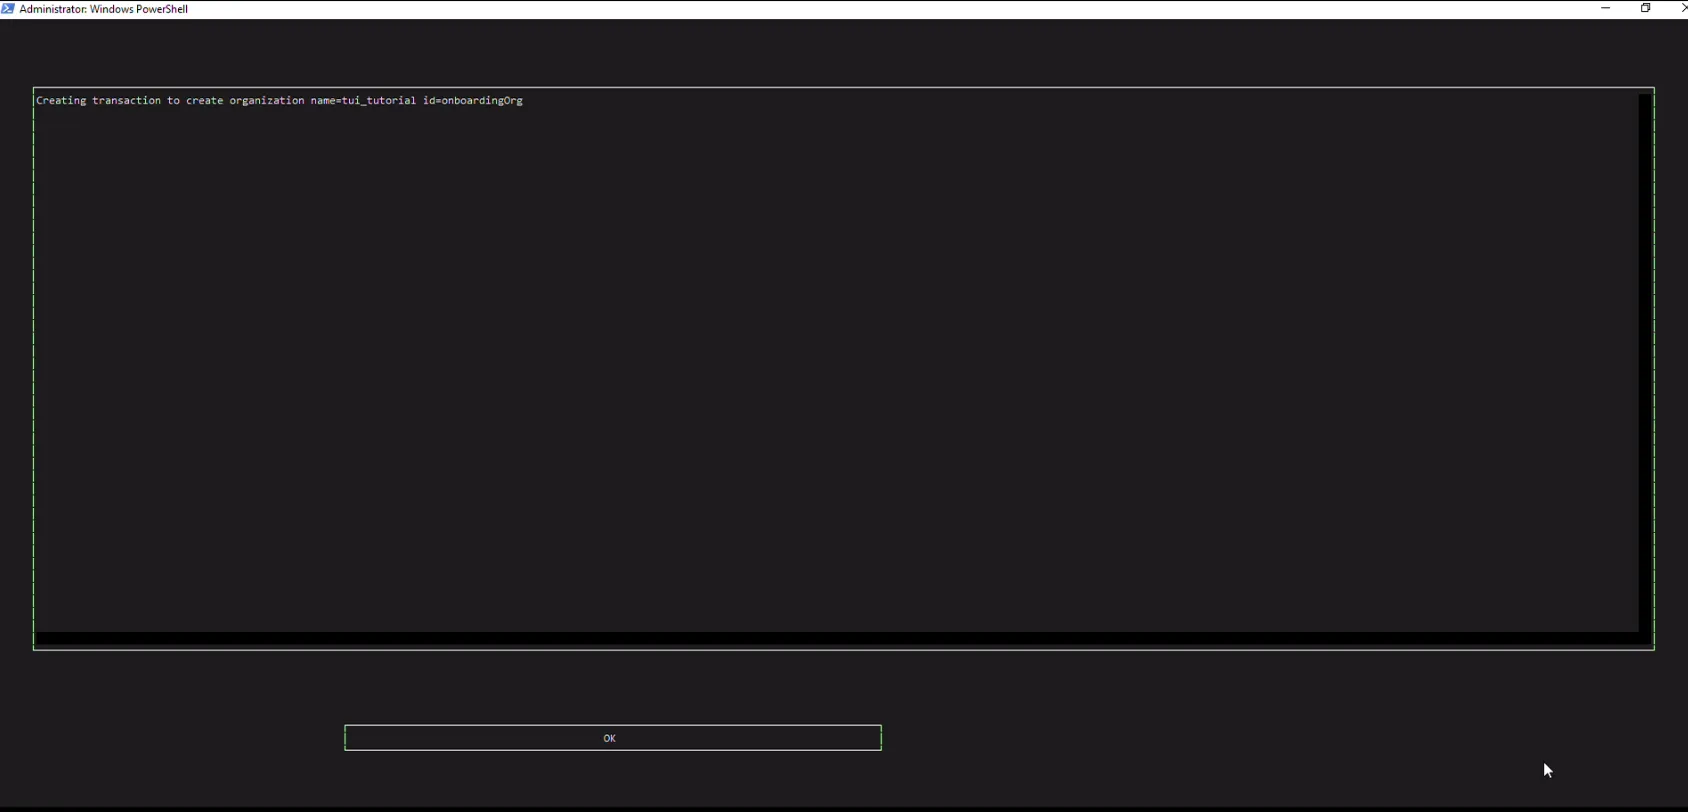
Step 4: Create organization
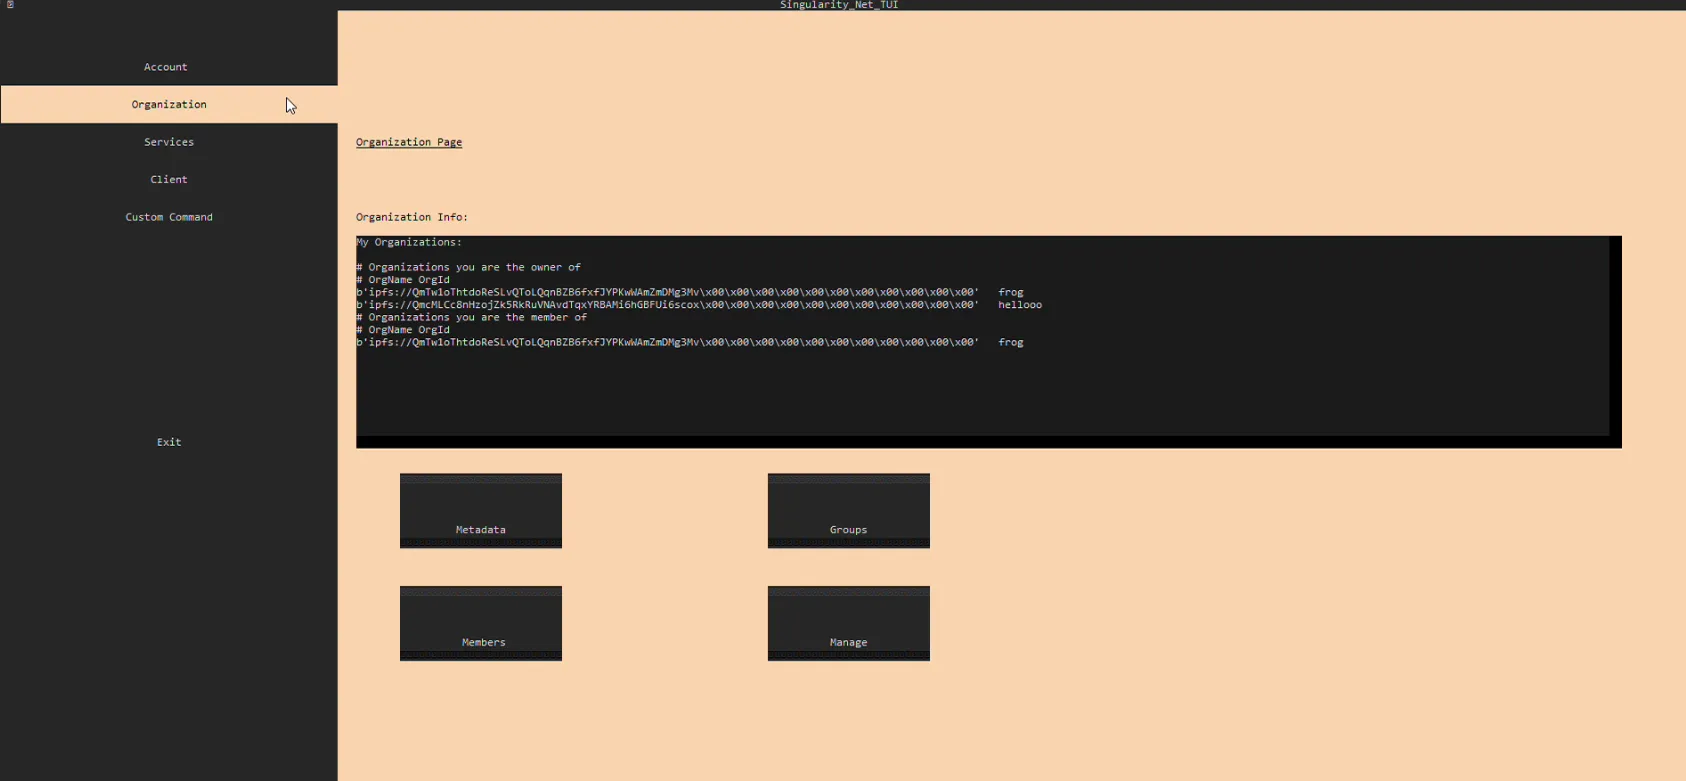
- Go to the Organization Page
- Go to the Manage > Create Organization
- Enter Organization ID. This is an identification for your company. You can choose every available id. This data will be used by users when accessing via the CLI
- Enter Metadata File Path. This is the path to JSON file that contain metadata of your organization.
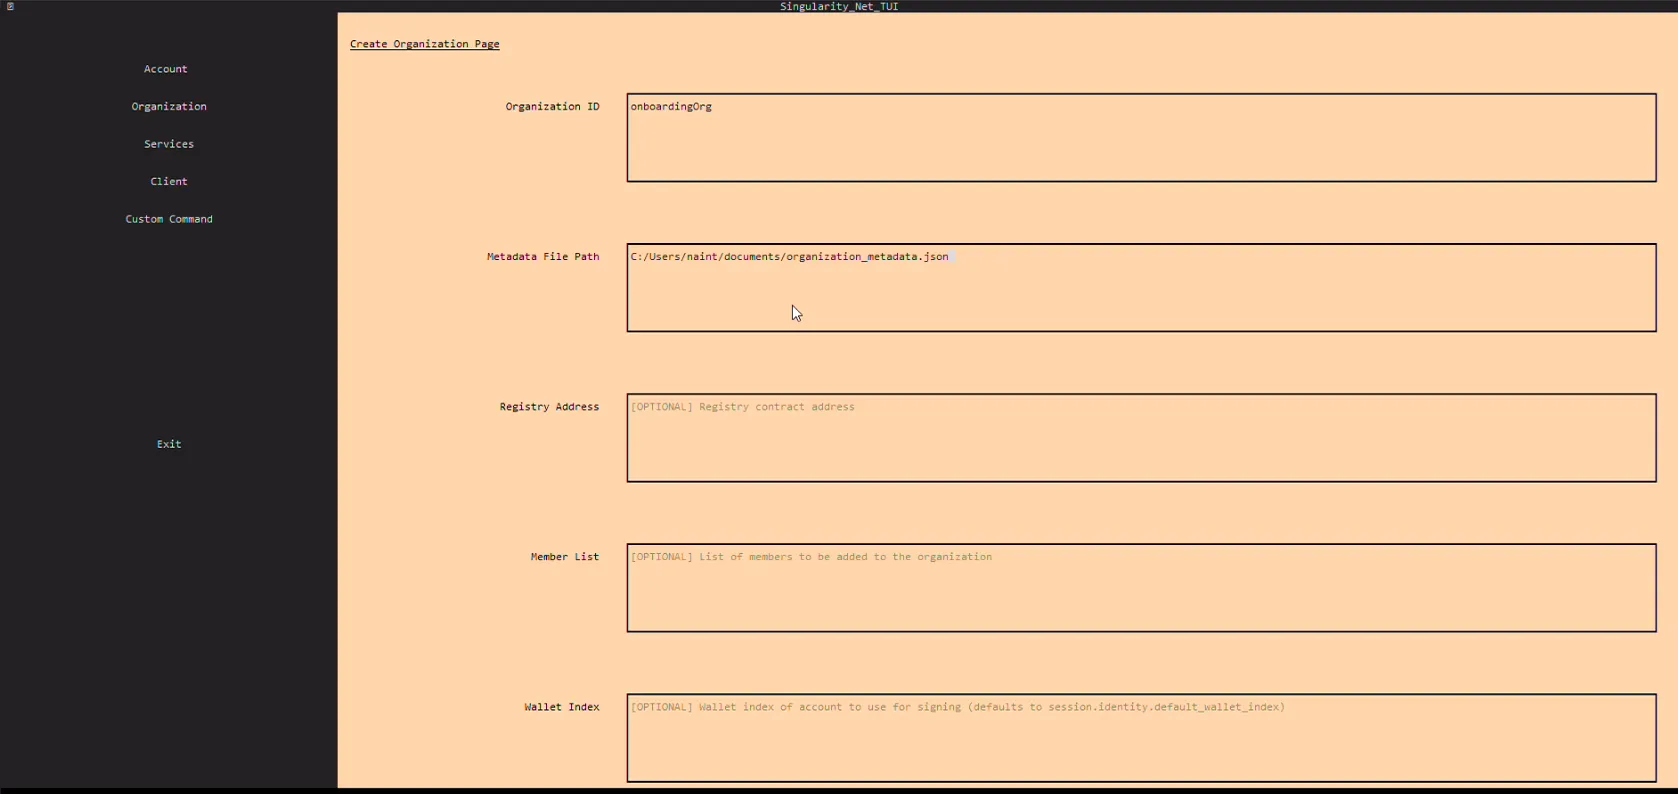
- Press "Create Organization". Organization was successfully created!
Step 5: Deposit some ASI (FET)
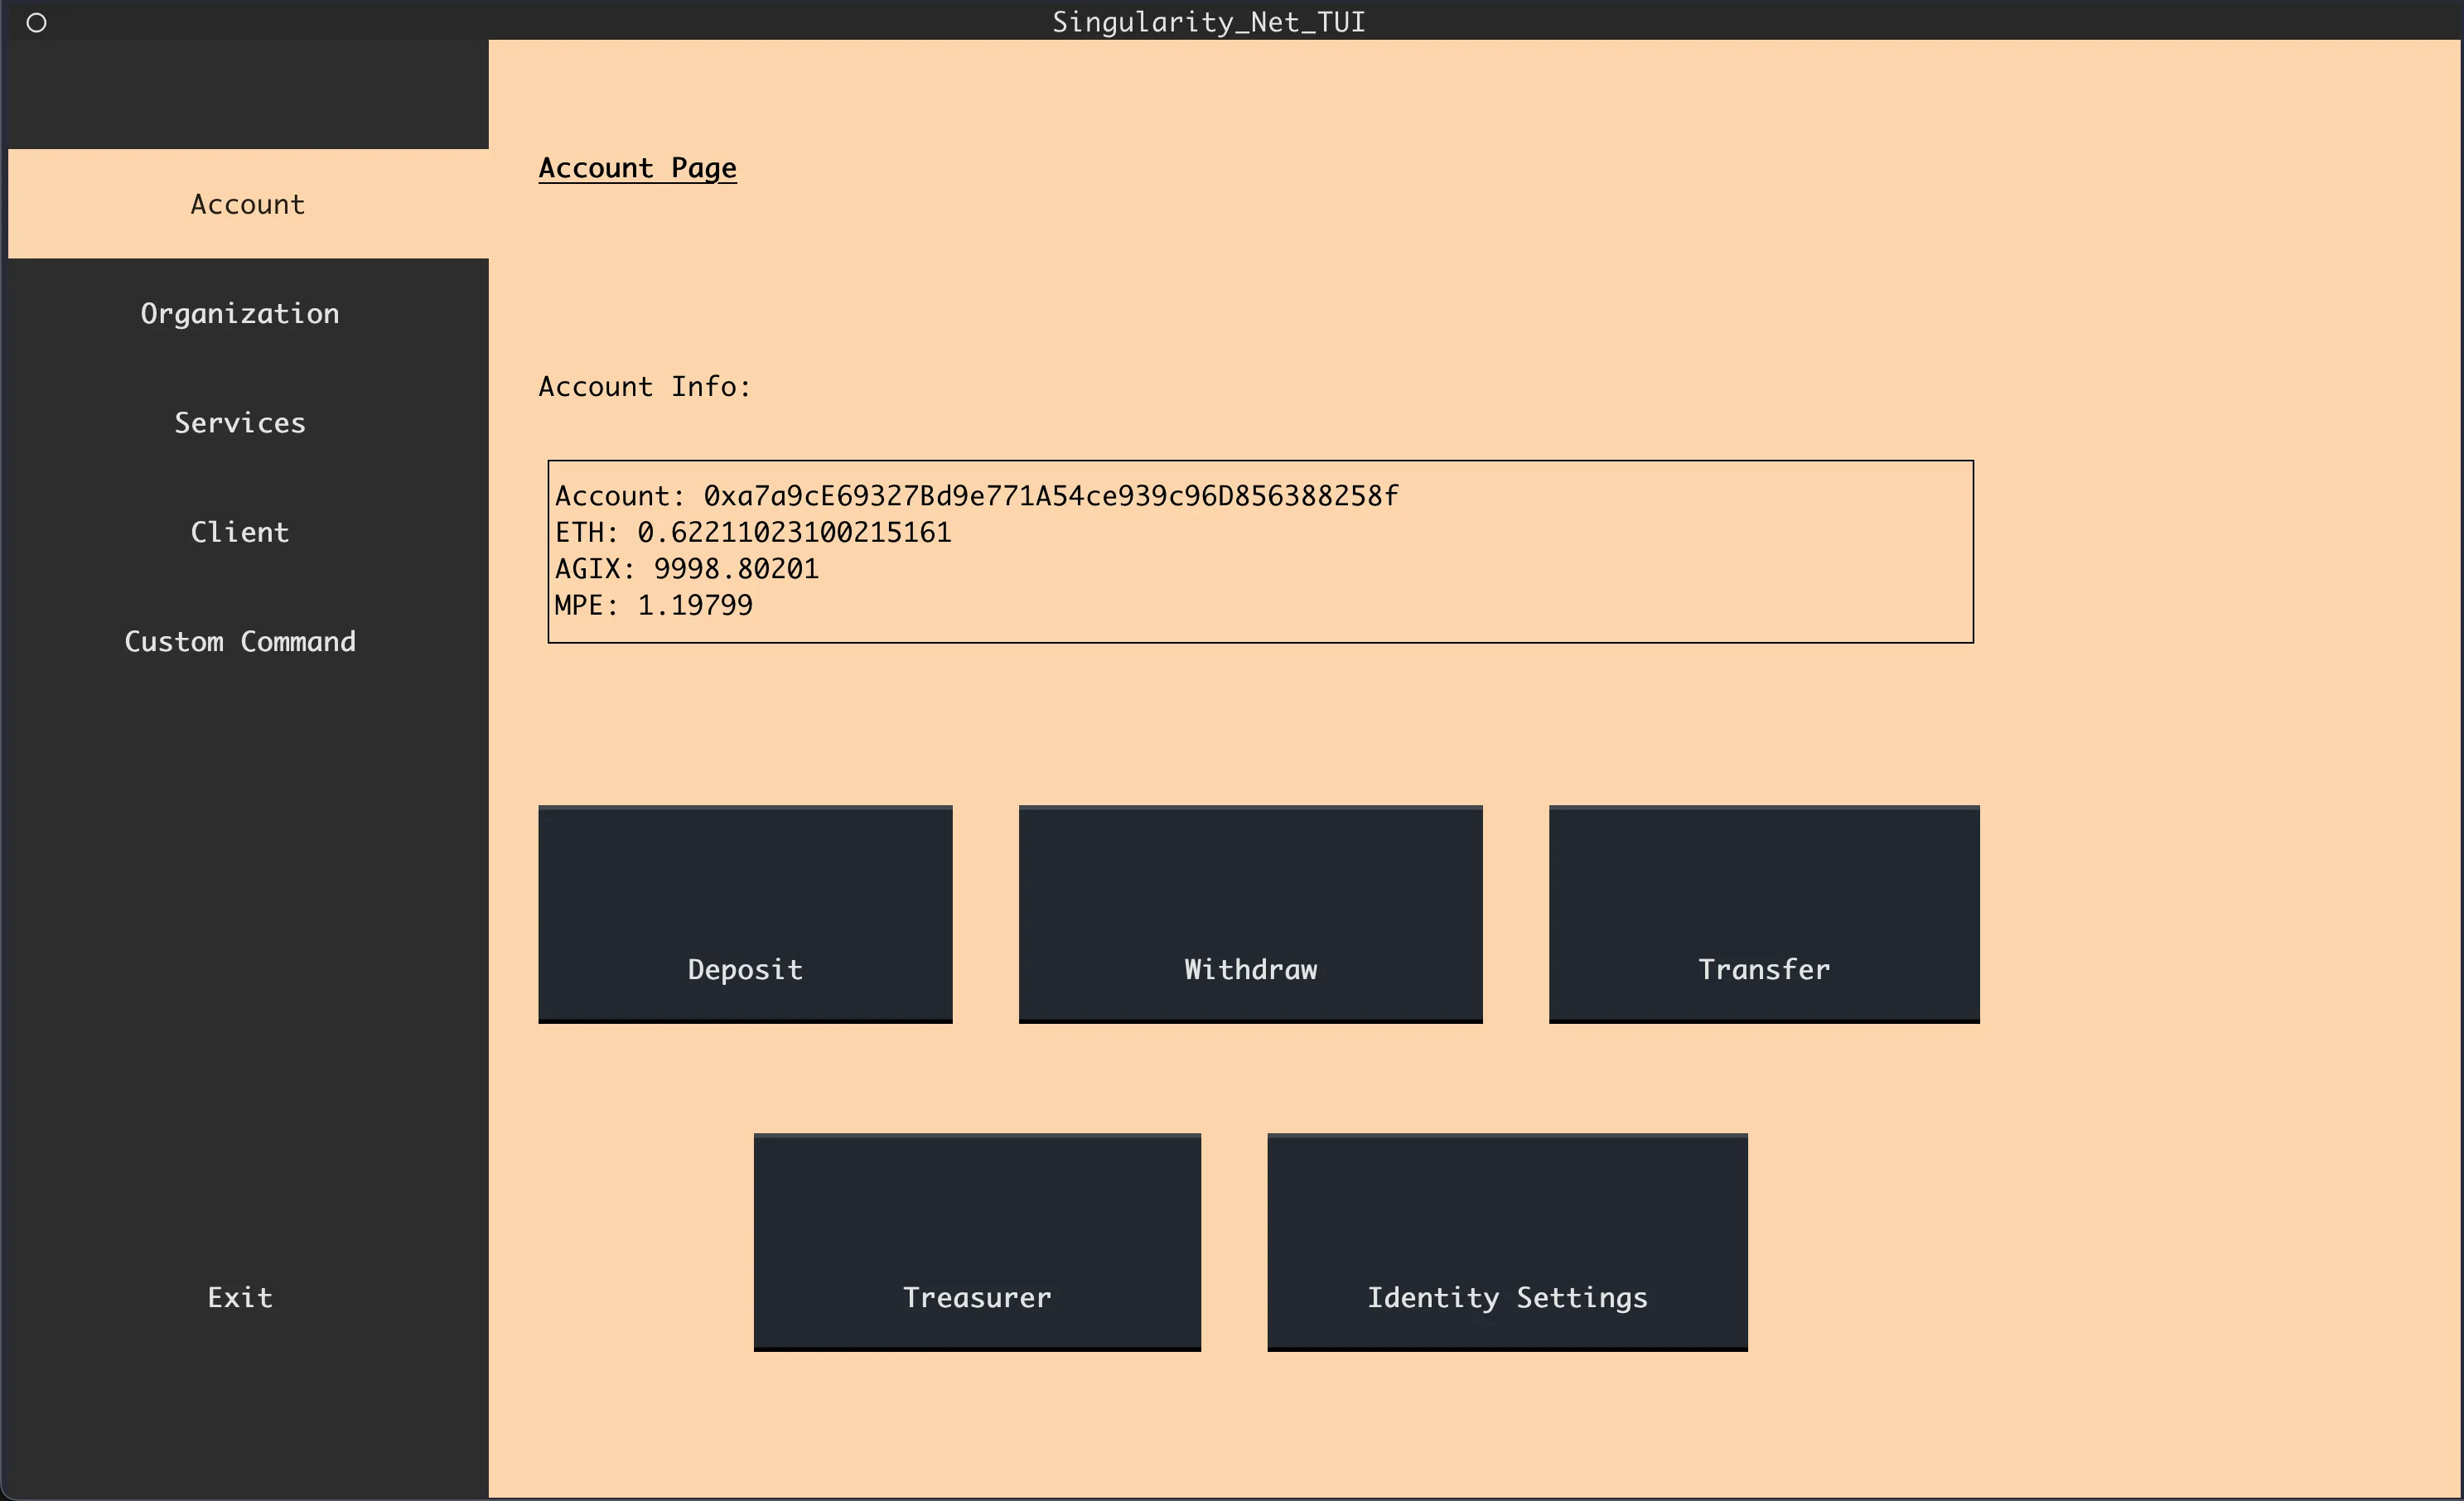
- Go to Account page
- Go to Deposit
- Enter amount of ASI (FET) Token you want to deposit.
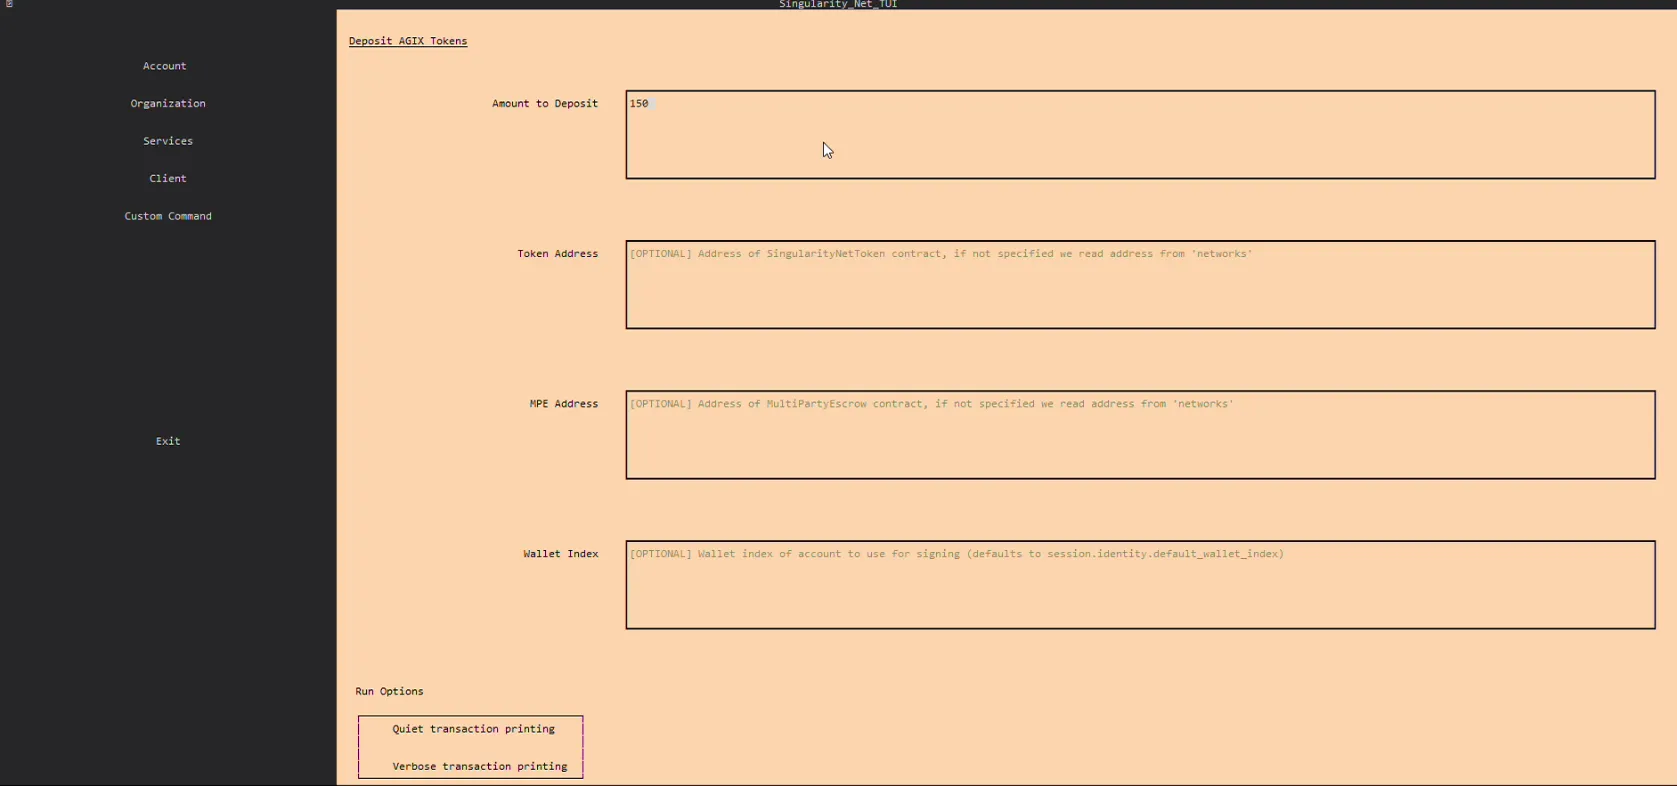
- Press "Deposit"
Step 6: Create your own service
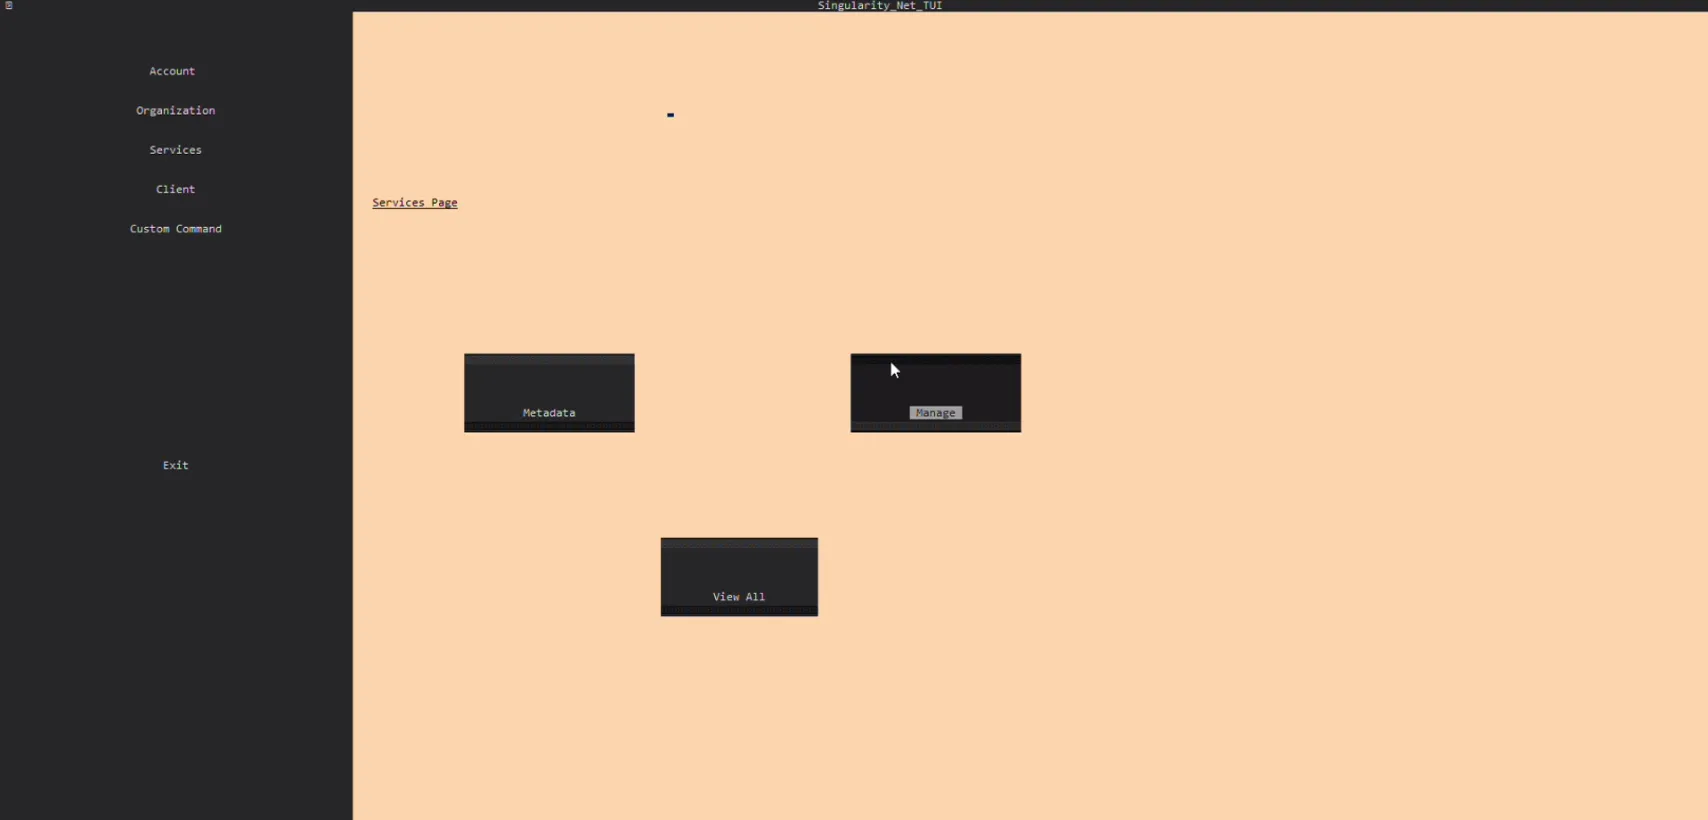
- Go to Services page
- Go to Manage > Publish Service
- Enter Organization ID. This is ID of your organization to which the service will be attached
- Enter Service ID. This is ID of your service. This data will be used by users when accessing via the CLIs
- Enter Metadata File Path. This is path to JSON file that contain metadata of your service.
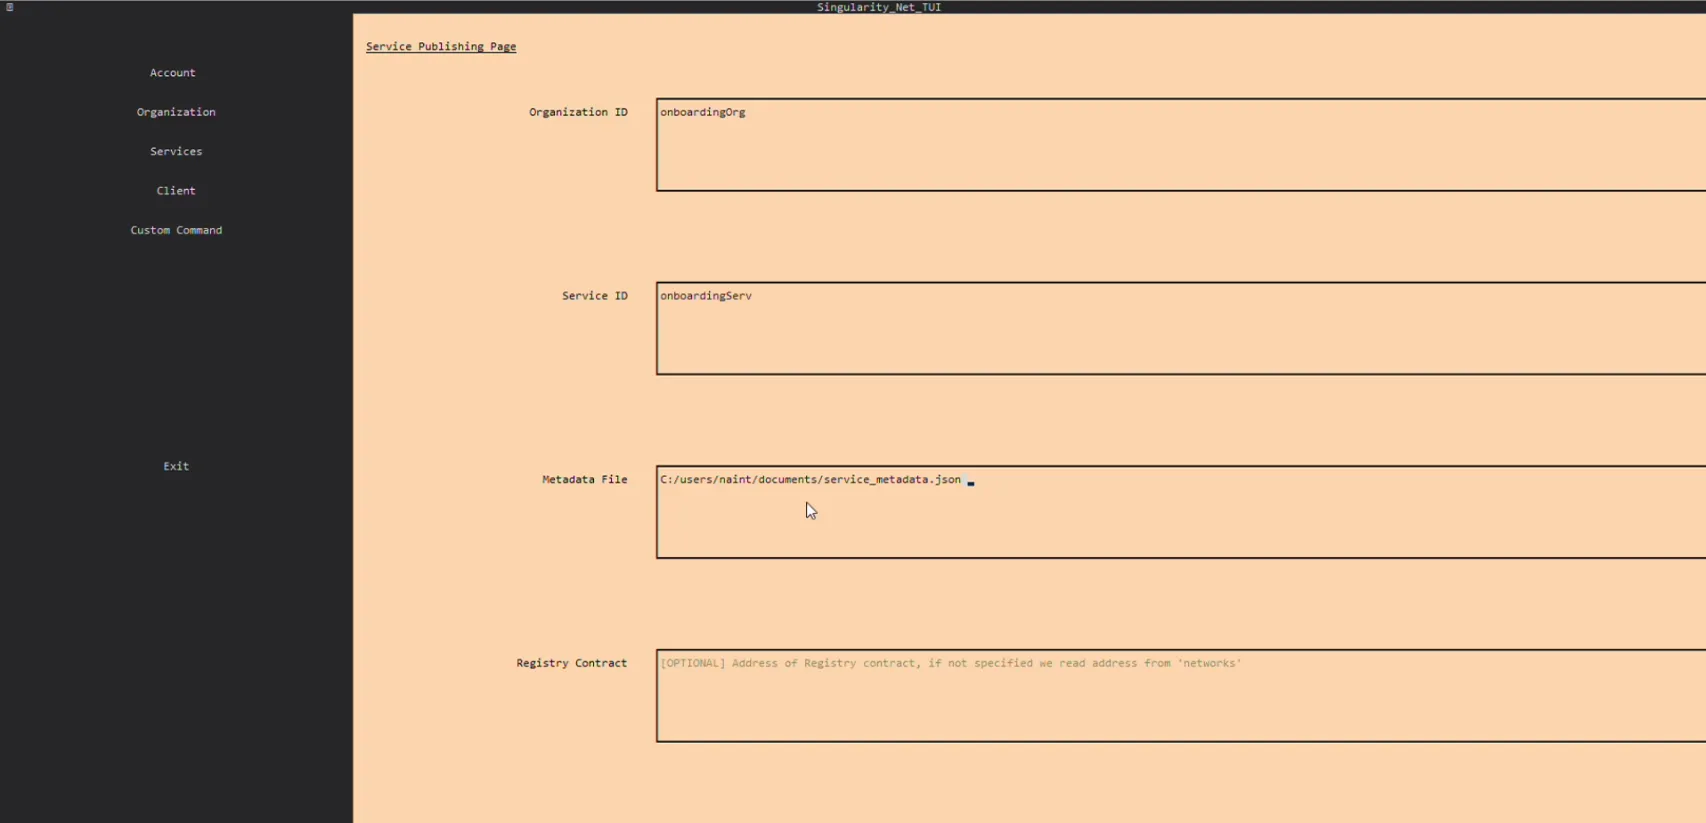
- Press "Publish Service".